
|
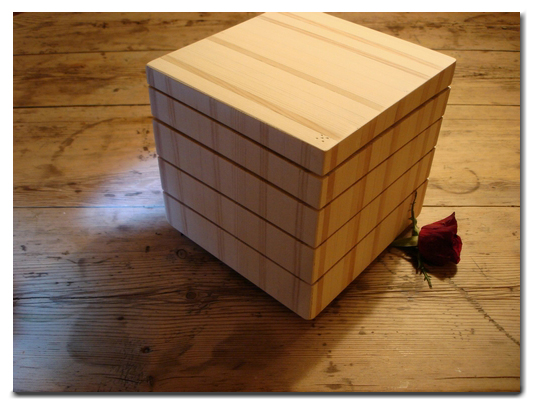
This
jewelry cube consists of five slices. Each slice has sloping sides -
and therefore sloping internal bases. The reason for this was to soften
the imposed strictness of form. |
|||
 |
 |
||
 |
|||
|
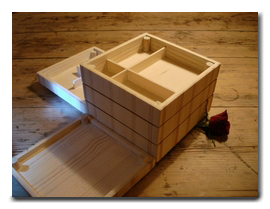
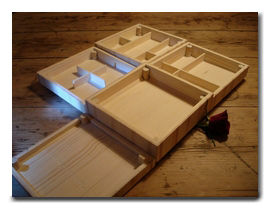
In the internal corners, each foot-list is segmented into five parts. For each of the five segments (bottom, first, middle, last and cover) the feet segments have equal length. However, since the sides slope up and down (some 3 mm per side), there is only one way to successfully assemble the cube. The bottom edges and internal bases consequently are not on level with the table - and the feet's top ends will be seen to end at different 'debths' from the top edges. So, free pearls would naturally assemble in the bottommost corner. However, when a segment is placed on the table it will sit steadily with no wobbling. To make it easier to stack the box, one corner's foot is not round, but four-sided. On each top I bored one to five dots, to sequence the parts. You may see the five-dot corner on the top (left picture). There is some space between the slices, to make each slice easily visible and easy to lift. There is no lock to keep the slices together. I glued 6x34 mm lists crossed with 3x15 / 3x8 mm pine lists. The thinner list were older and tanned, contrasting nicely with the new lists. I painted the cube's inside and outside with thinned, white oil paint. It was treated after half an hour with a soft cloth - to give a transparent, white look. My gift to my wife Three other jewelry boxes are here, here and here. ©2007 - Original design and woodcraft by Øyvind Teig, Trondheim, Norway |
|||

Search words in Norwegian: Hjemmesnekret smykkeskrin, hjemmelagd, smykkekube |
|||